
For anglers, there's something deeply satisfying about crafting a fishing lure by hand and then using it to land a prized catch. The Ultimate Fishing Lure Project isn’t just about making a lure—it’s a journey that connects creativity, craftsmanship, and the thrill of the outdoors. From the first cuts of wood or metal to the moment the line tugs tight, this project transforms a simple idea into a functional piece of angling art.
Step 1: Concept and Design
Every great fishing lure begins with a purpose. Are you targeting bass in freshwater, or maybe sea trout in the surf? Understanding the species, water conditions, and fishing techniques is crucial. Sketching out the design is the first step. This includes the shape, size, color pattern, and action the lure should have. Some lures mimic baitfish, others frogs or insects—each detail influences how it moves and attracts fish.
Step 2: Material Selection
Wood is a popular choice for handmade lures, especially cedar and balsa due to their buoyancy and ease of shaping. For more durability, some opt for plastics or even metal. The material affects not only the lure's buoyancy but also how it handles hooks, weights, and paint. Choosing the right components—like treble hooks, split rings, and eyes—is also essential for both function and aesthetics.
Step 3: Crafting the Lure
Shaping the lure is where the design comes to life. Using carving tools or rotary equipment, the raw material is cut, sanded, and detailed according to the original blueprint. Precision is key, especially for balance and symmetry, which affect how the lure behaves in the water. After shaping, small holes are drilled for attaching hardware and hooks. Adding a wire harness inside can increase strength, especially for larger predatory fish.
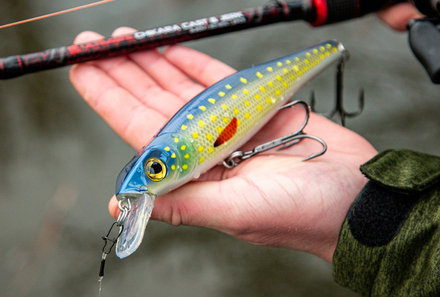
Step 4: Painting and Sealing
Painting is where creativity meets realism. Some anglers aim for hyper-realistic patterns that mirror local baitfish, while others go bold with vibrant colors and glitter for attraction. Airbrushing allows for smooth gradients and fine details, while stencils can add scale patterns and stripes. Once painted, the lure must be sealed—typically with an epoxy or UV resin—to protect it from water and wear.
Step 5: Field Testing
The ultimate moment arrives when the handcrafted lure hits the water. Testing includes watching how it swims, sinks, or floats, and making tweaks as needed. Maybe the lure needs more weight in the belly, or the lip angle adjusted for a better dive. These tests not only refine the lure but also build the angler’s confidence in their creation.
From Hobby to Legacy
Crafting fishing lures is more than a hobby—it’s a skill that can be passed down through generations. Some anglers even turn their creations into small businesses or collectable items. But the greatest reward remains that first strike, when a fish bites a lure made by your own hands. The Ultimate fishing lure manufacturer Project is not just about catching fish—it's about catching the joy of the sport itself, from craft to catch.